Search This Blog

Showing posts sorted by relevance for query squirrels. Sort by date Show all posts

Thursday, February 5, 2015

Critter of the Month: Gray Squirrel – Adorable or Pest? You Be the Judge

"Come on up and learn about us, humans!"
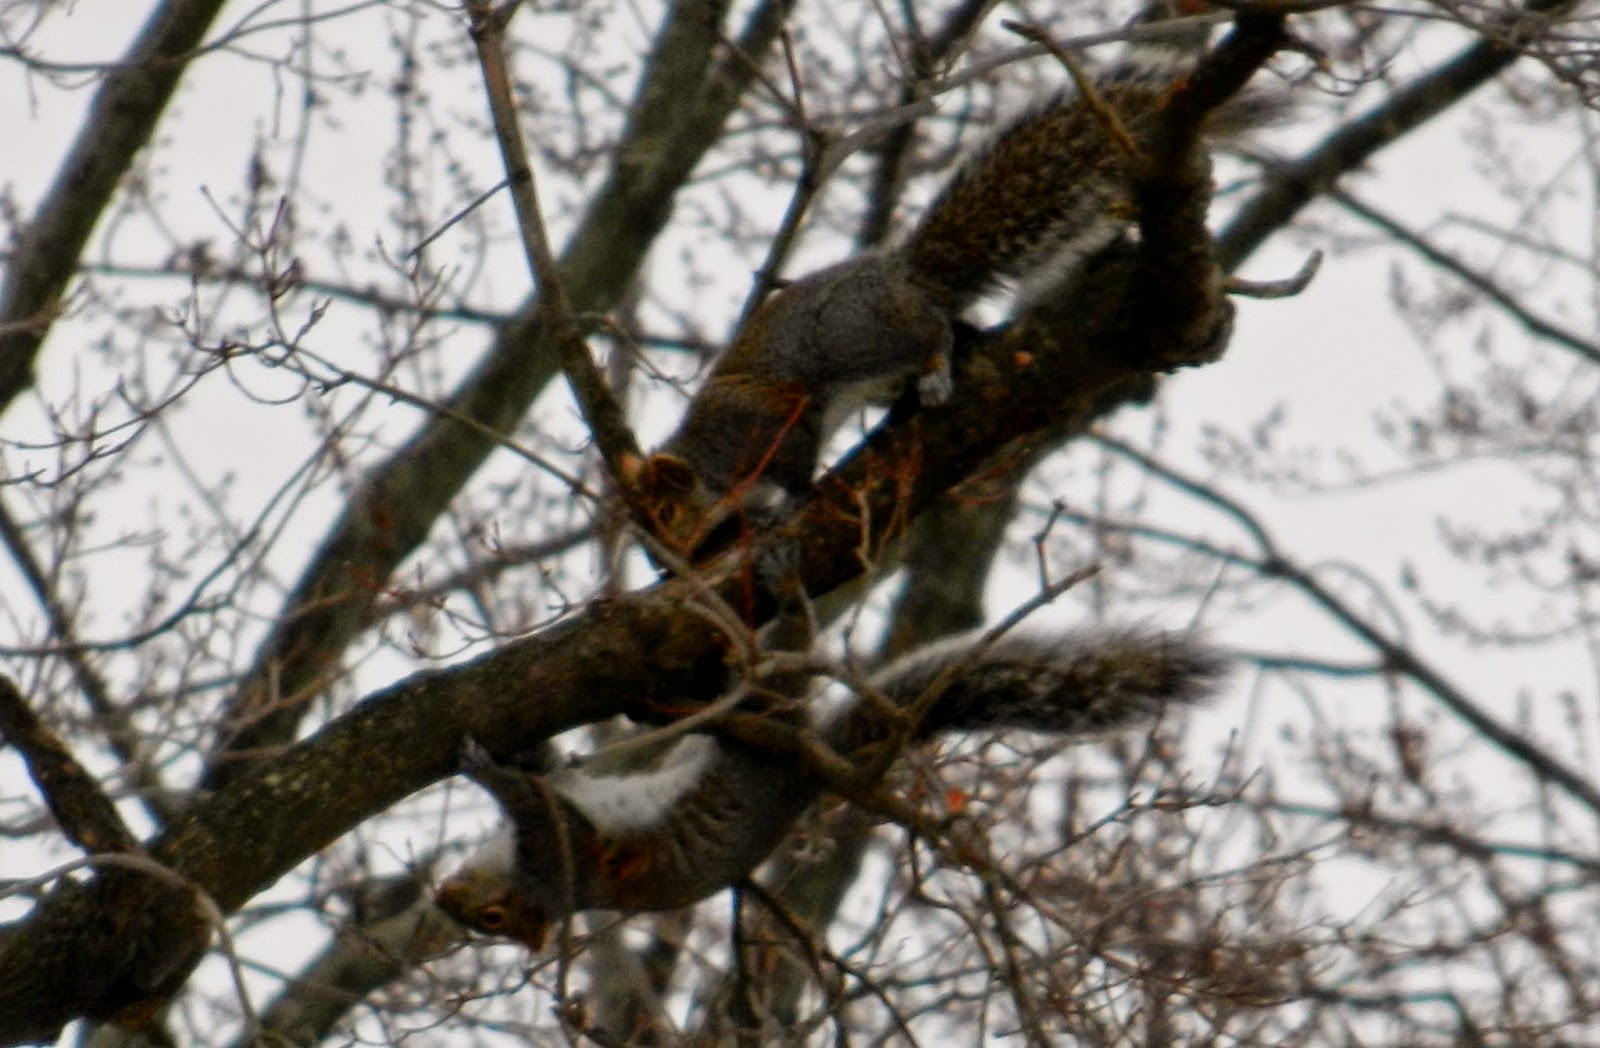
Larry, Moe & Curly
The Eastern Gray Squirrel is also called Sciurus carolinensis.  They are EVERYWHERE in my neighborhood.

 My home is located in their perfect habitat: an area with many mature oak and pine trees along with neighborhood gardens and bird feeders full of seed.  In addition, there are few if any predators. The coyotes do not enter our neighborhood, and for some reason I haven’t seen many birds of prey overhead. Their other potential predators simply don’t live in this area... so the squirrels are taking over!

Squirrels are very fun to watch, and very clever.  They seem to be able to figure out how to get birdseed out of a feeder no matter how many “squirrel proof” gizmos you buy.  They scamper and jump among the branches of trees with amazing ease.  They chase each other and chatter. 

On the other hand, they can make a mess in the garden.  They gnaw at perennials, eat the fruit off trees, and eat spring bulbs.  They drive dogs crazy.  Sometimes, they even nest in the roof!  They are some of the cutest pests you will ever see!

So let’s learn more about them!  Here is some information:

Typical Gray Squirrel Coloring.
Appearance:
Gray squirrels are rodents.  That is to say, they are furry mammals with sharp incisors for gnawing.  They have sleek bodies and fluffy tails.  Both sexes look basically the same, with no difference in
color or body size.   They are typically dark to pale gray in color with some cinnamon tones to their coat.  1 in 10,000 may be black, and even more rarely they may be albino.  In my neighborhood, we have all 3 colors!  They weight between 11.91 – 26.43oz (338-750g), and range from 14.96 -- 20.67inches (380.0-525.0mm) in length.

1 in 10,000 American Squirrels Has Black Fur
Average Lifespan:
12.5 years in the wild and around 20 in captivity.

Geographic Distribution: 
In the eastern United States from a bit west of the Missisissipi, east to the Atlantic coast and north into Canada.  They may also be found in Scotland, Ireland, England and Italy.

Habitat:
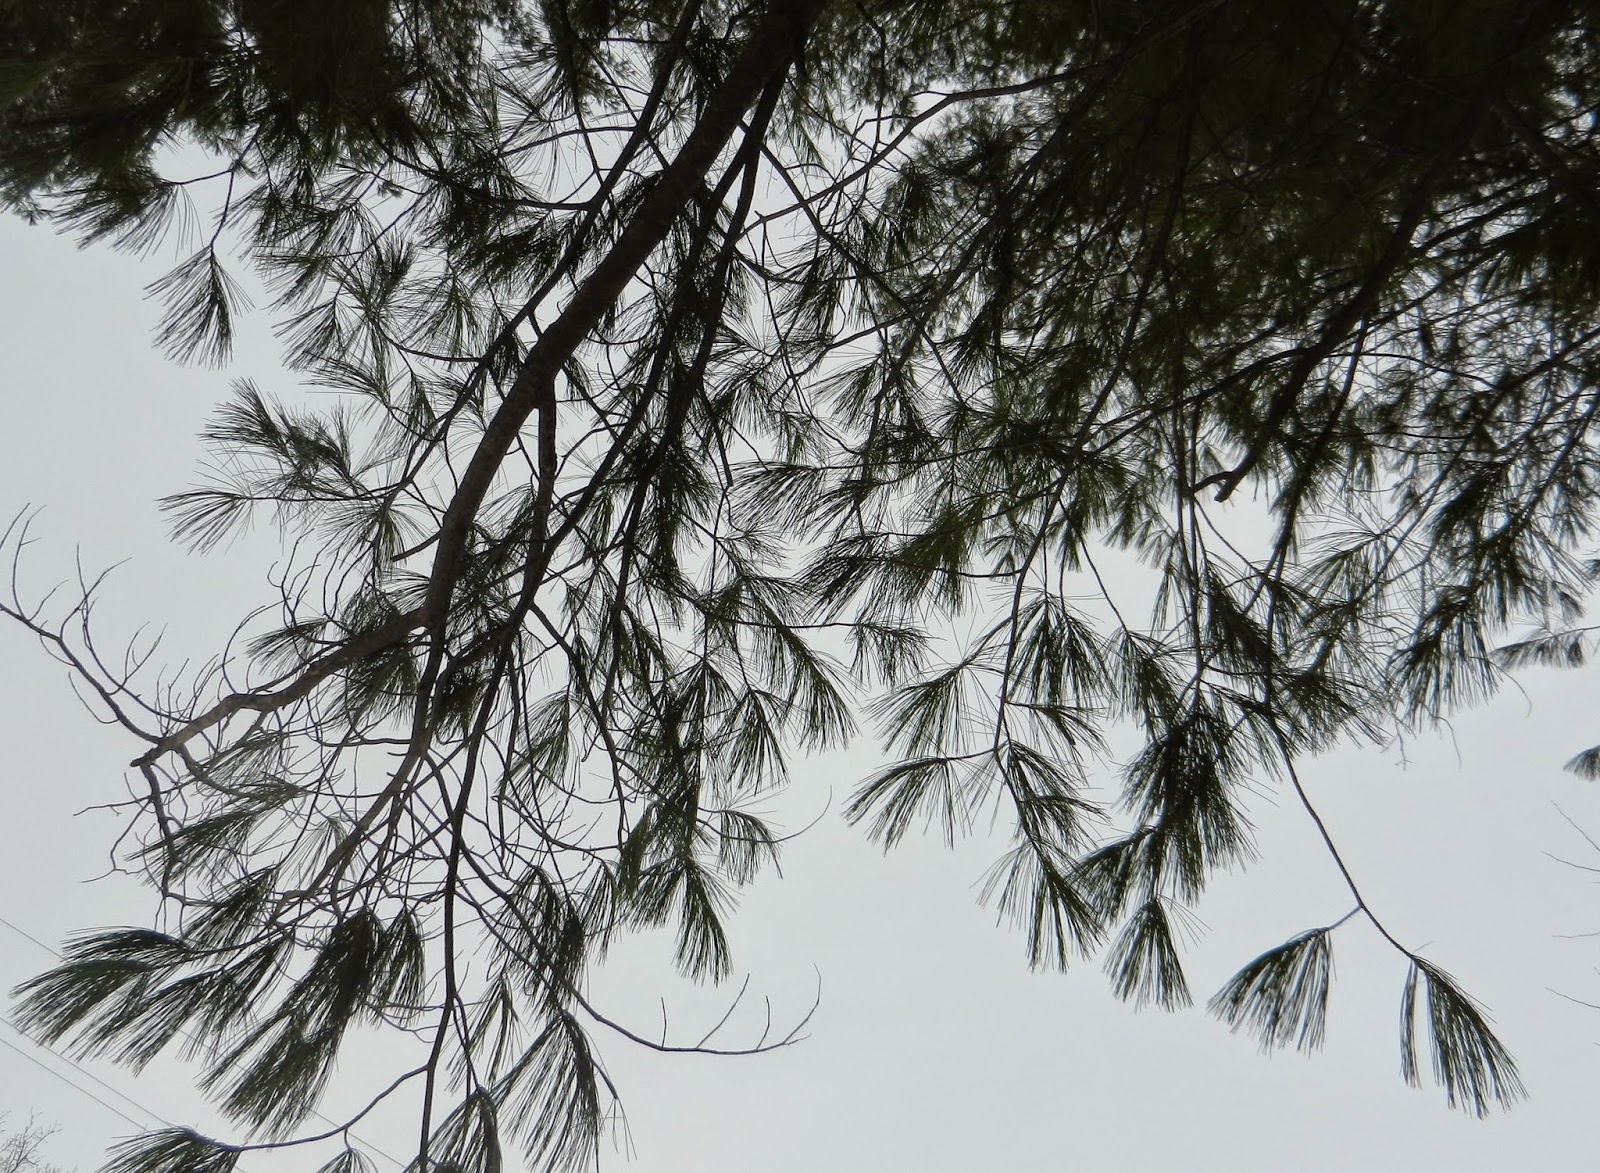
Gray squirrels live in mature forests with mixture of tree types and good food supply.  They make their nests out of piles of leaves and twigs in trees.  The nests can be seen in the branches of these trees at a distance of  30-45 feet above ground.
The Rare Albino Squirrel Lives in Our Neighborhood!

 What They Eat: 
Gray Squirrels are omnivores. They eat the nuts, flowers and buds of 24 species of oak.  They also eat the nuts, seeds and fruit from hickory, pecan, walnut, beech, elm, buckeye, horse chestnut, hackberry, mulberry, maple, dogwood, hawthorn, black gum, cherry, hazelnut, hornbeam, ginko, cedar, hemlock, pine, and spruce.  In addition they eat insects, bones, bird eggs, nestlings, fungus and frogs.  They become pests to gardeners when they eat garden plants such as bulbs, fruit, flowers, herbaceous plants, corn, and wheat. They also sharpen their teeth on branches and bark.
"Nom, nom, nom, nom!"

They are known to hoard food by burying it in holes for later. They locate their stores later via memory and smell.  

Behavior:
Gray squirrels are territorial.  They guard the areas near their nest and where they find food.
They are most active 2 hours after sunrise and a few hours before sunset.
They communicate by vocalization (chattering), tail flicking and smell. 

Reproduction:
Squirrels reach sexual maturity by 15 months of age.  They breed twice a year between December -- February and again between May --June.  Gestation lasts 44 weeks and the litters contain 2 to 8 pups each.  The babies are born naked and weigh 13-18g.  They nursed by their mothers and drink milk like most mammals.  They are generally weaned by 10 weeks age, and reach adult size by 9 months age.  

"Home at last!"
Predators:
Humans, weasels, red foxes, bobcats, grey wolves, minks, lynx, coyotes, owls, falcons, and hawks all hunt and eat squirrels.  

Ecology:
Squirrels are food for predators, spread seeds & fungal spores to new locations, and host parasites (ticks, fleas, lice, roundworms). 

Repellants:
There are several products sold to help deter squirrels. These include coyote urine, motion-sensor sprinklers, electric devices that emit an annoying high-frequency sound, and fake owls.  These function with varying degrees of success.   You can also set live traps to catch and release squirrels elsewhere.  Please do NOT poison squirrels.  If you try this, you will almost certainly end up poisoning other animals by mistake – possibly even your own pets or even children!

Advice for Gardeners:
  • If you want to protect your bulbs: first build a cage of chicken wire around the bulbs, then bury the entire cage into the ground during planting time.  This will keep animals from digging up the bulbs and eating them.
  •  If you want to protect your vegetable garden:  When constructing a raised garden, build the “box” or sides of the garden out of wood, stone, tires or other materials.  Then, lay chicken wire down against the ground and a couple of inches up the side of the “box”.  Place the topsoil
    A comfortable branch.
    on top of the wire.  This will keep animals from digging into the garden from below.  You can also place chicken wire above the topsoil to keep animals from digging downward.  Next, build a fence around the garden. Place streamers or spinners around the fence to deter the squirrels, or use one of the repellant devices mentioned above. 
  • If you have a plant or plants that are very tempting to squirrels, you may want to consider building a chicken-wire fence with a roof over it (like a wire box) to protect the plants. 
  • Allow your dog and cat to roam the yard and do what they do best.
I hope that this information is useful to you, dear reader!
Now, go outside, and watch some squirrels frolic!  Go!  You know you want to!
"Whee!"
 Please remember to share this blog with others.  Simply click the social media links to the right. 
If you can, please consider clicking the links to the right to donate to some worthy causes and/or shop at Amazon.com.
Whatever you do, NEVER stop observing and learning from nature. 

Thursday, January 1, 2015

MI Critter of the Month 1/2015: Black-Capped Chickadee


Happy January, dear readers!  I hope that 2015 will be an excellent year for you all.

I thought that once a month it would be nice to learn about a local "critter" often found in Michigan gardens.  To that end, here is our first:  the black-capped chickadee!

Chickadees are adorable!  There is a mated pair of them that love to hang out in the dense foliage of the arbor vitae in my back yard, and frequent the bird feeder.  I have named them "Herbert" and "Rose". They share the feeder openly with other birds, and don't mind when I get close to watch them or take their picture.

Where to Find Black-Capped Chickadees:

Chickadees live in the deciduous and mixed forests, open woodlands and suburban areas of North America.  They range from Alaska east across Canada to Newfoundland and south to northern California, northern New Mexico, Missouri and northern New Jersey.  They winter south to Maryland and Texas.  They are very common here in Michigan! 
Chickadees like to nest in the holes of rotten trees, natural cavities, and bird boxes. They hide in individual holes alone in the winter, and form nests for their eggs in the spring.  The female usually selects the spring nesting area. They make their cup-like nests out of grass, fur, plant down, feathers and moss.  Then, they lay 1 to 13 brown speckled white eggs in spring. They incubate the eggs for 12 to 13 days, after which the eggs hatch into ugly little babies with eyes closed, and no feathers except for some grey fuzzy patches here and there.

How To Recognize a Black-Capped Chickadee:

Well, first of all, they look like the pictures shown here!  They are sized 4.7 to 5.9 inches (12-15cm).  They have a wingspan of 6.3 to 8.3 inches (16-21cm) and weigh 0.3 to 0.5 oz (9-14g). They have a black "cap" on top of their head and a black patch on their throat.  They have white cheeks, a gray back, and dull white underparts.  The males and females look very much alike.
You can also recognize a chickadee by its song.  It sings either "chick-a-dee-dee-dee" (adding more "dee's" when excited or in danger) or whistles "fee-bee." The Cornell Ornithology Lab has recorded their song, and you can listen to it here: Link to Chickadee Song.  Chickadees use their song to communicate with each other, but other birds also listen in and heed their "danger" warnings.

How to Attract Black-Capped Chickadees To Your Yard or Garden:

Feed them! They love to hang out at bird feeders. According to the Cornell Lab of Ornithology, "In winter Black-Capped Chickadees like to eat about half seeds, berries, and other plant matter, and half animal food (insects, spiders, suet, and sometimes fat and bits of meat from frozen carcasses). In spring, summer, and fall, insects, spiders, and other animal food make up 80-90 percent of their diet. At feeders they take mostly sunflower seeds, peanuts, suet, peanut butter, and mealworms. They peck a hole in the shell, and then chip out and eat tiny bits of seed while expanding the hole.This means that you can feed them the standard bird seed found at most mega-marts as well as blocks of suet.  They will love you for it! Chickadees will also collect and hide food for later -- a little like squirrels. They can remember thousands of hiding places!

You can also provide nesting boxes for them.  Place the nesting box at least 60 ft into a wooded area and put some sawdust inside.  Put a guard on it (like an upside down funnel) to prevent predators from climbing into the nest.  Do not put the nesting box directly onto a tree or predators will be able to enter the nest. 

Black-Capped Chickadee Behavior:

Chickadees are pretty social for birds.  They share the feeder with many other birds.  According to Cornell Lab, "Winter flocks with chickadees serving as the nucleus contain mated chickadee pairs and non-breeders, but generally not the offspring of the adult pairs within that flock. Other species that associate with chickadee flocks include nuthatches, woodpeckers, kinglets, creepers, warblers and vireos."
You can see from my picture to the left that this is true.  The day that this picture was taken, the chickadee shared the feeder with a flock of wrens, a mated pair of cardinals and at least one woodpecker.  Chickadees are also fairly curious and easy to tame.  They like to investigate new things and can learn to eat out of the human hand.

Black-capped chickadee populations are on the decline.  Please help work to protect these and all other wild creatures.  They are national treasures.

In summary:  Black-capped chickadees = friendly, flying winter cuteness! They make the garden a cheerful place, even during the coldest months.

LEARN MORE:

To geek out on more chickadee (and other bird) information, please check out these resources (the citation list for this blog post) and search for the books at the Amazon link below:

Bull, John et. al. National Audubon Society Field Guide to North American Birds: Eastern Region. Chanticleer Press Inc. 1994. Pg. 611. 

The Cornell Lab of Ornithology - "Black-capped Chickadee." Webpage: http://www.allaboutbirds.org/guide/Black-capped_Chickadee/lifehistory. Active 1/1/2015.

National Audubon Society - "Black-capped Chickadee." Webpage: http://birds.audubon.org/birds/black-capped-chickadee.  Active 1/1/2015.

Roach, Margaret. "A way to Garden - What birds do in Winter."  Blog: http://awaytogarden.com/birdnote-qa-birds-winter/. Active 1/1/2015.

DID YOU KNOW?
Cornell Lab of Ornithology collects data from citizens who count birds in their back yard.  They use this information to estimate bird populations and track bird habitats.  You can find out more about participating in this project at the Cornell Lab of Ornithology Citizen Science Web Page. 

Have 1 sec.? Please click the “follow” or share buttons (g+, Facebook, pintrest) to the right of the blog text to share or follow this blog.

Have 2 mins.? Click the “comments” (sometimes it says “no comments”) link at the bottom of the article and share your own ideas on this topic. I would LOVE to hear from you!

Have $? Click the donate buttons to the right to help humanity!

Broke? Donate blood to Red Cross.  Click the link under the donate  section to find out how. Or, click the "Greater Good" link under the donate section. On that site there are "give" buttons that cost you nothing but a glimpse at some advertisements, and still donate to charity.  Also, consider donating your time to a local charity this year.

As always, thank you for reading my blog!

Friday, July 31, 2015

Herbs, Berries, New Attempts, Flowers & Failures: A Mid-Season Summary

If you live in Michigan, you know that this summer (2015) has been unusually rainy and cool.  Fortunately, there has been an increase in temperature recently that caused many of the plants to put on a sudden burst of growth.  This was not only great to see, but prompted me to start my mid-season harvest / herb trim.

My mid-season herb & berry harvest

HERBS, BERRIES & VEGETABLE HARVEST:

Fennel: The bulb is looking nice on this, I harvested a few of the fronds to dry. They make great seasoning as well as tea. They have a nice anise/licorice flavor.

Hyssop: I will also be drying this for tea. It has a very sweet anise/licorice flavored leaf and flower.

Tarragon: This herb is great for seasoning poultry and eggs. I will be drying it for that purpose.

Catnip: I grow and dry this to give as gifts to my friends with cats.  The kittens love it!

Mint: This is so versatile! I dry it as tea, use it to flavor spaghetti sauce, use it in mojitos. The list goes on and on.

Chamomile: I dry the sweet apple-ish flavored daisies as tea.

Majoram: I dry this to use in my herb mix for Italian seasoning.

Rosemary: I use this fresh with a variety of dishes including pork, bread etc. I also dry some.

Winter Savory: I will be drying this one as well. I use it to flavor meats and stews.

Oregano: I dry this to use in my Italian seasoning mix. This is the herb that makes pizza sauce taste like pizza sauce.  In fact, if I get enough tomatoes, I may make and can/jar pizza sauce.  I will certainly  make and can/jar spaghetti sauce.  Check the blog later for recipes and how-to!

Thyme: I dry this and use it in the Italian spice blend. I also use it to season poultry and fish.

Indigo Rose Tomatoes - PURPLE BLACK!

Gooseberries: FAILURE ALERT! I didn't put netting over these this year, so the birds, squirrels and chipmunks ate most of them. I only got one bowl full.  I will freeze these to use in smoothies and yogurt.  Next year, I will definitely protect the bushes with netting. I would like to get a harvest large enough to make jam!

Onion: I only planted a few of these this year. I grew them from seed.  They seem to have done pretty well. I will be planting more next year when I install the vegetable garden.

The first Tomatoes of the season: I have only had a couple of cherry tomatoes and one Roma ripen so far, but there are many more hanging off the bushes - still green. I can't wait for them to ripen! I only put in 4 tomato plants this year.  I will be planting more next year when I put in the vegetable garden.


My Herb Drying Rack in the Basement
HOW TO DRY HERBS:

This could not be more simple.  Just find a cool dry place.  Set up a clothes line, clothes rack, or pound some nails into some rafters. If the herbs are long enough, you can lay them across the clothes rack. Otherwise, just tie the herbs together by their stems and dangle them upside down from the clothes line or rafters.  Make sure they are spaced out for good air circulation.  Also, remember to label them. Some of the herbs look very similar once dried.  You can also taste them to figure out what they are if you forget to label.

 Once the herbs are dry, just pick off the leaves and put them in a dry jar.  The herbs should keep for at least a year. But they will lose flavor over time.


Northern Kiwi Vine

NEW ATTEMPTS:

1. Northern Kiwis - I have never grown a kiwi vine before.  But this year I bought one from the nursery and planted it so that it can grown over the sea wall near the lake.  It did not put on a whole lot of growth this year, but the leaves do look healthy.  I will need to wait 2-3 years to see full production of fruit.  I do hope it survives the winter! 

2. Cuttings - I have never tried to propagate a plant from cuttings before.  This year, I tried to propagate the rugosa roses, wild roses, raspberries and gooseberries.  I did this by cutting off a bit of new growth and placing the stems in some seeding medium and watering with willow water. (The you tube video where I learned to make willow water is here: http://www.bing.com/videos/search?q=youtube+willow+water&FORM=VIRE1#view=detail&mid=3909D200ECDBCD0229DE3909D200ECDBCD0229DE)

The cuttings were placed into some larger pots.
FAILURE ALERT: The raspberry cuttings and wild rose cuttings did not survive.  I think this is because I left too many leaves on the cutting.

SUCCESS: The gooseberries and rugosa rose cuttings did survive!  I have potted them on. They seem to have very good roots on them.  I am hoping that I can sell the rugosas in an upcoming garden club sale in a year or two. I want to grow the gooseberry in a shady place in my yard. I plan to start more cuttings in the future.
 
 
 3. Ginger - I tried starting to grow a ginger root over the winter in a sunny location.  This FAILED.  I was surprised, because I had grown one successfully this way when I lived in Washington D.C.  However, after some thought, maybe it wasn't so surprising.  The windows in D.C. were much warmer.  I had thought that I killed the poor root and placed it in the compost bin.  Lo-and-behold, it sprouted in the compost bin!  Lucky day!  I re-potted the ginger and now it is growing happily on my back deck in the warm, July weather.  I hope that it produces good growth so that I can bring it indoors in the fall - and that it will survive the winter.


WHAT'S BLOOMING JULY 2015:

Many of my June blooms are still going strong: daisies, black-eyed-susan, day lilies etc.  But there are some new flowers getting started now.  (I love how gardens change through the season, don't you?)  Here they are:

Phlox

More phlox

Roses
Day Lilies Glowing in the Sunset

And the peppers are starting to produce!

 White veronica, liriatris, day lilies and a rose.

That's all for now!

Check back later in the season for:

Spaghetti sause canning with a pressure canner.

Pimp my soil 3: Veggie garden mix and pH adjustment

Late summer flowers

And possibly more!


Monday, June 6, 2016

Vegetable Garden 2016 - Layout & Varieties Used

It's June in Michigan.  Things are finally starting to really grow. Including my vegetable garden, which is now completely planted.

Vegetable garden early June 2016 - view from the East looking towards the West

I have a relatively small garden in a relatively small (typical) lake lot (long and narrow).  My vegetable garden is approximately 18' x 20' in size and is located in the sunniest portion of my back yard (the North side of the house, facing the lake.)   Because the plot is small, I do not plant in traditional rows.  Instead I divided the area into 4 sections that I can access by narrow paths. I planted each of these areas with a variety of vegetables.  Some are grown in blocks like a patchwork.  Others, like the tomatoes and peppers, are interspersed as single plants here and there.  I have planted this way to make the most of my space.  I have also planted a few things, such as squash, in the bed near the lake where there is more room for them, and in containers on my driveway where there is more sun and warmth.

 Here is the basic layout of my garden (not to scale):


 If you want to see what each row looks like individually in a photograph, please scroll to the bottom of this blog entry.

I have grown a variety of vegetables in the garden.  Everything was grown from seed except for the parsley.  I started many of the vegetables indoors (in the windows with supplemental light from grow lights)  between February and March.  Other plants were seeded directly into the garden between mid-March and June.  Those planted in March were protected by cloches. The garlic was planted in late October 2015.

Here is a list of what I planted in the main vegetable bed & when:
Garlic Scapes
  • Dwarf Mulberry - planted fall 2014
  • Paw Paw sapling - planted spring 2015 
  • Garlic: 'Elephant', 'Music', 'German Mountain', 'Northern Jewel' and 'Purple Italian' - planted outside October 2015
  • Scallions - planted outside October 2015
  • Chives - planted outside early September 2015
  • Wild Leeks - planted outside September 2015 (still have not germinated, but the packet instructions said to wait 2 seasons before giving up on them.)
  • Leeks: 'American Flag' - started indoors January 2016, planted out late March 2016 (under cover)
  • Onions: 'Golden Grande', 'Sweet Spanish', 'Red Burgundy' - started indoors January 2016, planted out early April  2016 (under cover)
  • Peppers: Anaheim, Scotch, Cayenne, Jalapeno, 'California Bell' - started indoors February
    Chives
    2016, planted out late May 2016
  • Tomatoes: 'Great White', 'Beefsteak,' 'Boxcar Willie', 'Ace 55', 'Yellow Plum', and 'Roma' - started indoors February 2016 (a bit too early- should have started early-mid March), planted out late May 2016.
  • Basil: cinnamon, sweet, lemon - started indoors March 2016, planted out late May 2016
  • Victoria rhubarb - started from seed indoors February 2016, planted out early May 2016
  • Eggplant: 'Black Beauty,' 'Pumpkin-on-a-Stick', and a variety pack by Burpee - started indoors March 2016, planted out late May 2016
  • Chinese & Leaf Celery - started indoors February 2016, planted out April 2016
  •  Celeric: 'Giant Prague' - started indoors February 2016, planted out March 2016 (under cover)
  • Broccoli: 'Waltham 29' - started indoors March 2016, planted out April 2016
  • Cauliflower: 'Early Snowball' - started indoors March 2016, planted out April 2016 
  • Cabbage: 'Crisp Cool Hybrid', 'Taipai Red', 'Red Acre' - started indoors March 2016, planted out April 2016
    Radish Flowers
  • Carrots: 'Kaleidoscope Mix,' and 'Danvers 126' - planted outside late March 2016 (under cover)
  • Rutabaga - planted outside late March 2016 (under cover)
  • Radish 'Early Scarlet Globe'- planted outside late March 2016 (under cover)
  • Turnip Rooted Parsley - planted outside late March 2016 (under cover)
  • Calendula - planted outside late March 2016 (under cover)
  • Swiss Chard 'Bright Lights' - planted outside late March 2016 (under cover)
  • Peas - planted outside late March 2016 
  • Nasturtiums - planted outside early April 2016
  • Crimson Clover - planted outside early April 2016
  • Cucumber: 'Lemon' - started indoors late April 2016, planted out late May 2016
  • Watermelon: 'Crimson Sweet' and 'Sugar Baby' - started indoors late April 2016, planted out late May 2016.  I am keeping this in the vented cold frame all summer. 
  • Beans: 'Blue Lake' - planted outside early May 2016
  • Potato: 'Russet' - planted outside early May 2016
  •  Okra 'Burgundy'- started indoors May 2016, planted out late May 2016
  • Dill - planted outside mid-May 2016
  • Florence Fennel - planted outside mid-May 2016
  • Lettuce: 'Great Lakes' and 'Giant Cesar' - planted outside late May 2016
  • Luffa - planted outside late May 2016 
  • Zucchini 'Black Beauty' - planted outside early June 2016

I have another bed where I had planted strawberries, rhubarb, asparagus and lavender in spring 2015. There was some extra space in that bed so in early June, I direct sowed one mound each of:
  • Winter Squash: Butternut & Spaghetti
  • Summer Squash: 'Elite Hybrid' Zucchini, 'Black Beauty' Zucchini, Cocozelle, and Yellow squash
I also planted in pots in my driveway because it is a sunny and warm area that gives me a bit of extra growing space.  Here is what I planted in pots:


  • Potatoes: 'Red Northland,' 'Purple Majesty', 'Yukon Gold' and 'Russet' - started early May in half-whiskey barrels & protected by covering with an old window until late May
  • Jersusalem Artichokes - started early May in a half-whiskey barrel and protected by covering with an old window until late May
  • Nasturtiums - 'Empress of India' - started in early May in the same barrel as the Jerusalem Artichokes.
  • Tomato: 'Small Red Cherry', & 'Ace 55' (See main bed list above for seed starting & plant out dates)
  • Peppers: Anaheim, Scotch & Jalapeno (See main bed list above for seed starting & plant out dates)
  • Eggplant: 'Black Beauty', 'Pumpkin-on-a-Stick', and Burpee Variety Pack (See main bed listabove for seed starting & plant out dates)
  • Lettuce: 'Giant Caesar' & 'Buttercrunch' - started outside early June
  • Herbs: Fenugreek & Parsley - started outside early June; Lemon Basil & Sweet Basil (See main bed list above for seed starting & plant out dates)
Other garden edibles:
I started an herb garden last spring.  For more about that, click this link: Herb Garden.
I planted 2 'urban' columnar apples last summer, 2 pears in fall 2014, 1 gooseberry in fall 2014, 4 dwarf blueberry bushes last fall 2015,  2 paw paws spring 2015, 1 Saskatoon this spring and 3 elderberries this spring.  These are scattered throughout the garden.  I use them as landscape plants.  I hope to get fruit from them soon.  They are still fairly young.  So far, only the gooseberries have produced. However, it does look like I have fruit set on the apples, at least one of the pears, and on the blueberry bushes.  I just hope that I can get to the fruit before the squirrels, chipmunks and birds! (I may need to net the bushes.)

Hopefully, the vegetables will all grow in well.  I will post pictures of the garden's progress on Twitter, Instagram and Facebook throughout the season.

Find me on Facebook by liking: MI Lake Home Garden
On Twitter: @AlhramAndrea
On Instagram: MiLakeHomeGarden 

I will blog about my harvest sometime in the fall, I think. :)

Happy Gardening, dear reader!  Have a great summer!

Pictures of the Vegetable garden rows 1-4 as corresponding with the drawing at the start of this post:


Row 1 - View looking from the South looking North


Row 2 - View from the East looking West

Row 3: View from the East looking West
Row 4: View from the East looking West


Saturday, January 17, 2015

Plant of the Month: White Pine (Pinus strobus)

One of my favorite places to be is up North on a cool summer's day surrounded by the luscious smell and whispering quiet of a white pine forest.  The needles underfoot muffle the sound of footsteps while a gentle breeze carries their smell through the air.  The long, soft needles swish gently far overhead.  This place possesses an unparalleled sense of peace that endures in my memory.

The eastern white pine is a magnificent evergreen tree.  It towers over most other trees, typically reaching 50-80 feet (15-24 meters), but
can occasionally grow up to 200 feet (61 meters).  They can reach a width up to 40 feet (12 meters) and have been known to live up to 500 years!  It is no wonder that standing among them induces a sense of timelessness, spiritual calm, and even of being very small within a very big world.

This tree was once found nearly everywhere throughout the state of Michigan.  The lumber was so sought after that over 160 million trees were cut down as lumber between the years of 1834 and 1897.  The wood was used for everything from building the railways to rebuilding the city of Chicago after the great fire of 1871.   This lumber was an important source of income for the state.  The lumber industry was the financial bridge between the days when the first settlers hunted and traded for fur and the subsequent advent of the automobile industry.  Due to its financial importance to the state the eastern white pine was legally made the state tree on October 14, 1955. (Act 7 of 1955)

This is definitely a tree worth learning about!  So here are the facts:

Names: Pinus strobus, eastern white pine, white pine, pin blanc, soft pine, weymouth pine, northern white pine.  Also known to the Iroquois, Ojibway and Zhingwaak tribes as the "whispering pines" or "the tree of peace".

Shape: Young trees are pyramidal.  When the trees get older, the branches become more horizontal and ascending.

Needles: Soft, evergreen.  3-5 inches (7.6-12.7cm) long .  5 blue-green needles per fascicle.  No fascile sheath.

Image from http://www.forestryimages.org
Fruit/Flower: 6-8 inch (12-20 cm) long, 1inch (2.5cm) thick, often curved, cones. The cones turn from green to brown with age.  Small finger-shaped yellow pollen heads.

Twigs: Grey-green to orange-brown color.

Bark: On young trees, the bark is a smooth grey-green color.  On older trees, the bark is a thick grey-brown or reddish-brown with prominent ridges.

Where Found:  Zones 3-8 in xeric northern mine forests and mixed hardwood forests.  In Canada they range from Manitoba across to Newfoundland.  In the U.S.A. They range from Minnesota to the Atlantic Coast and south along the Appalachian Mountains to northern Georgia and Alabama.  Please click this link to the USDA's map for current range.

Growing Conditions:  Full sun to light shade.  Seedlings need at least 20% of full sunlight to grow.  Prefers moist well-drained loam, but tolerates anything from light sandy soil to heavy textured soil.

Growth Rate:  Rapid, about 16 inches per year.

Reproduction & Establishment: Pollination takes place between April and June depending upon latitude.  The trees can produce viable seed once they reach an age of 20-30 years.  The seed germinates in spring and is dispersed by wind and wild animals.

Pests & Diseases:  White pine weevil, pine blister rust, sawfly caterpillars, adelgids, bark beetles, eastern pine shoot moths.

Environmental Importance:  The seed feeds: squirrels, voles, mice and 16 species of song bird. 
The foliage feeds: snowshoe hares, deer and cottontails.  The roots of young trees feed pocket gophers.  Due to their height, white pines are the nesting site of 81% of bald eagles,  77% of osprey and the cavities house a variety of nesting wildlife.  Bears also like to climb white pines as an escape from predators.

Economic / Human Uses: Timber, Christmas trees, erosion control.  White pines are often used to stabilize strip mine spoils in the Appalachian coal fields.

Other Interesting Facts:  
  •  White pines are moderately fire resistant.  Mature trees can survive most surface fires.  Seedlings do not usually survive.  
  • White pines are drought tolerant. 
  • Hartwick Pines State Park near Grayling, Michigan has a 50 acre stand of virgin white pines as well as a museum of logging history in Michigan.  It is a wonderful place to visit! 
I hope that my blog has inspired you to seek out and spend more time among the eastern white pines.  To learn more, please visit the web pages listed in the works cited section below, and check out some of the links to the books as well!

If you have a moment, please remember to share this page via social media using the links below.

If you have a moment more, and perhaps some cash, please consider donating to the worthy causes with links to the right of the page, or consider using the amazon links or 313 sails link to go shopping.  

As always, thank you for reading.


Works Cited:


Wednesday, November 11, 2015

Autumn Gardening: Projects & 1 Failure!


Autumn is in full swing. Winter is right around the corner..

The weather has been strangely cool this spring and summer (2015) and oddly warm this autumn.  Usually, by early November in Michigan zone 5b, we have had at least one brief snow. Instead, this year we have had a couple of mild frosts, and several 70F (or higher) days.  VERY unusual.

On the plus side, this has given us a longer span of time in which to gather leaves, mulch, plant bushes, and clean up dead plant material.  All the usual tasks of fall.

GATHERING LEAVES 

If you have read any gardening articles this fall, you know how important leaves are to gardeners!  But in case you haven't read any other articles: LEAVES ARE IMPORTANT!  They are high in mineral content and provide essential microscopic fungal organisms for the soil that help your plants grow.  Here are few quick tips on how to make best use of your autumn leaves:

Composting leaves.

1. Compost the leaves.  Leave provide the "brown" or "carbon" component that is essential to making good compost.  Do not burn your leaves!  Throw them in the compost heap! Your plants will love you once the compost breaks down!

2. Make leaf mold.  Leaves are full of fungal organisms and minerals that are great for plants.  These are most concentrated in leaf mold. Making leaf mold is super easy.  Just gather the leaves, pile them up, and let them rot. You can contain the leaves in a bin with air holes poked in it, in a small area fenced with chicken wire,
Perforated bag of leaves to make leaf mold.
or you can do what I did: put them in a black plastic bag, add water to the bag, poke holes in the bag, then stash the entire thing under the deck.  Leaves take some time to break down.  You can expect leaf mold in 1-2 years after collection depending on your climate. If you wish to speed the process try shredding the leaves and/or mixing them with a high nitrogen material such as coffee grounds, manure, urine, or corn gluten meal.

                                                              3. Insulate your roses (or other plants).  Piling
Insulated roses within a burlap wind-break.
leaves up around the base of roses during the winter can help to insulate the roots.  You can further protect the roses, and hold the leaves in place by erecting a barrier made from garden stakes and burlap. This acts as a wind break and keeps the stems from drying out and dying. Be sure to remove the leaves in the spring to avoid causing rot from moisture build up at the base of the rose.

4. Use the leaves as mulch.  Leaves make excellent mulch.  They help to insulate the ground, protect the soil organisms
Mulching with leaves.
and are a favorite food of earthworms.  To mulch with leaves, simply pile them onto your garden bed to a depth of 1-2 inches.  If you wish, you can shred the leaves first, which will make for a cleaner/neater and more uniform look.

5. Leave the leaves alone!  Unless your leaves are extremely thick to the point of shading out your lawn, consider allowing them to stay where they are.  Most of them will break down by spring and will help to fertilize the lawn and garden. They also help to shelter beneficial insects, amphibians, and small mammals.

GARDEN CLEAN UP

Please do not go crazy with fall garden clean up! You do not need to cut back all of your perennials. You definitely should NOT prune trees!

Leaving perennial leaves and stems in place is often a GOOD thing to do!  The seed heads help to feed birds and small mammals.  The hollow stems allow beneficial insects to over-winter in the garden.  The leaves and stems act as insulation for the plants own roots through the winter.  So leave them alone now, and clean them up in spring!  I am giving you permission to procrastinate!! :)

There is one exception: clean up diseased material.  If one of your plants had a disease (e.g. black spot, powdery mildew) it is a good idea to clean up their leaves and any debris from the plant and to either send this material to the municipal dump, or burn it. This will help to prevent the diseases from re-emerging next spring.

DO NOT PRUNE TREES OR BUSHES IN THE FALL!  The plants may have lost most of their leaves, but they are not fully dormant yet!  Pruning encourages plant growth. This is not an ideal time of year for a plant to put on new growth. It wastes the plant's energy which is better stored for next spring.  Also, if the plant makes new shoots in fall, they are likely to get damaged over the winter.  So please, save your pruning for when the plant is completely dormant.  Prune in late winter or early spring (January to March in Michigan zone 5b)!

FALL IS FOR PLANTING

Vacciunium cyanococcus 'jellybean.'
Fall is a great time to plant trees and bushes.  If you plant in fall, the soil is still soft and warm. This allows the plant to establish healthy roots and then to rest through the winter.  By spring, the plant will be so happily situated with regard to its roots that it will put on very healthy spring growth.

This fall, I planted dwarf blueberries, myself.  The varieties I chose were 'jellybean' and 'northcountry'.  The 'jellybean' variety should grow to a maximum size of 3ft tall by 3ft wide and 'northcountry' should grow to a maximum size of 3ft tall by 4 ft wide. I purchased these bushes at a local nursery. They have several nice looking buds on them and the roots appeared to be very healthy in the pot.   I am hoping for berries within a few years of the plants getting establishes! YUM!!

If you are interested in growing blueberries yourself, please remember that they need acid soil with a pH of 4 to5 in order to be able to absorb the nutrients that they need.  If your soil is not acidic enough, you can increase the acid by amending the soil with peat moss and/or sulfur.  But beware!  Maintaining acidity in soil that is not naturally acidic can be difficult.  This will require testing the soil pH yearly and amending it yearly in order to maintain the health of your plant.  Also, be sure to select a plant that is hardy in your USDA growing zone, and one that will grow to a size that you can manage in your landscape. In other words: READ THE TAG (or online growing description)!

FEED THE BIRDS

Remember to fill your bird feeders and to put out suet. Many birds are flying south and can use the extra energy. Soon, the wild plant seed and fruit will be consumed by a variety of creatures, and winter will be here.  There will be a shortage of food for the birds who need the energy to keep warm.  So please, keep those feeders full until spring!  Also, remember to provide an ice-free water source if you are able.  

NIFTY TIP:  I learned from the "You Bet Your Garden" podcast that hot pepper/chili powder can be mixed with bird seed or can be used to coat suet in order to deter squirrels from eating the bird seed.  Why? Birds like hot peppers. Their beaks do not have mucous membranes, so the spicy-hot capsaicin  does not burn their mouths. However, squirrels do have mucous membranes in their mouths (just as humans do) so the capsaicin burns their mouth. If they get it in their eyes while dangling from the bird feeder, their eyes will sting as well. They will avoid the bird feeder after that sting!
 
"F" IS FOR "FALL" AND ALSO FOR "FAIL"

I can't remember where I saw it, but I found what I thought was a cute bird feeder project on the internet.  This involved cutting a pumpkin in half, scooping out the insides, filling it with bird seed as if it were a bowl, and putting it out for the birds to use as a feeder.  The idea was that the birds would eat the seed and also nibble on the pumpkin.  EPIC FAIL!

This project did not work at all.  While the pumpkin did make a cute bowl (see the picture on the left), none of the birds pecked at the pumpkin at all as far as I could tell. Even worse, the moisture from the pumpkin moved in to the seed via osmosis and made for a damp, grainy mess that was unappetizing for the birds, and began to rot rather quickly.  My advice: use a regular bird feeder, and skip the cutesy pumpkin nonsense!


Happy Fall Y'all!  Check in soon for more blog posts!  :)